Chapter 5: Individual Filter Editing
Configure individual filters to control how customers search and filter products on your storefront.
Accessing Filter Edit Mode
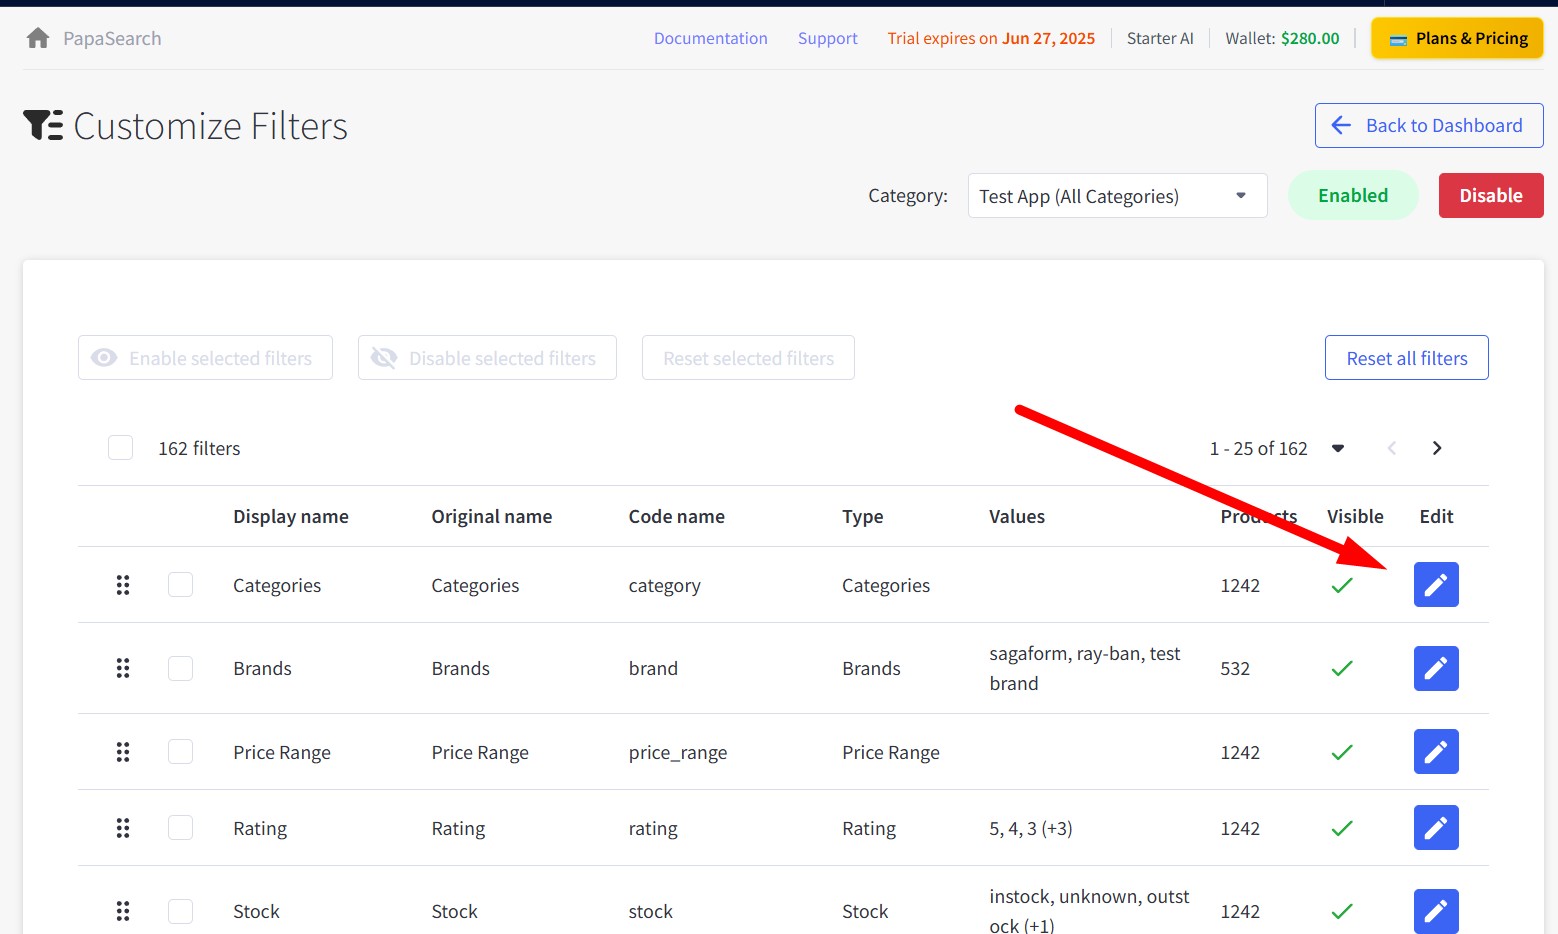
- Navigate to Dashboard → Customize Filters
- Select your Category from the dropdown
- Click the "Edit" button (pencil icon) for any filter
Reordering Filters
Change filter display order using drag and drop. Click and hold the ⋮⋮ icon, then drag to reorder.
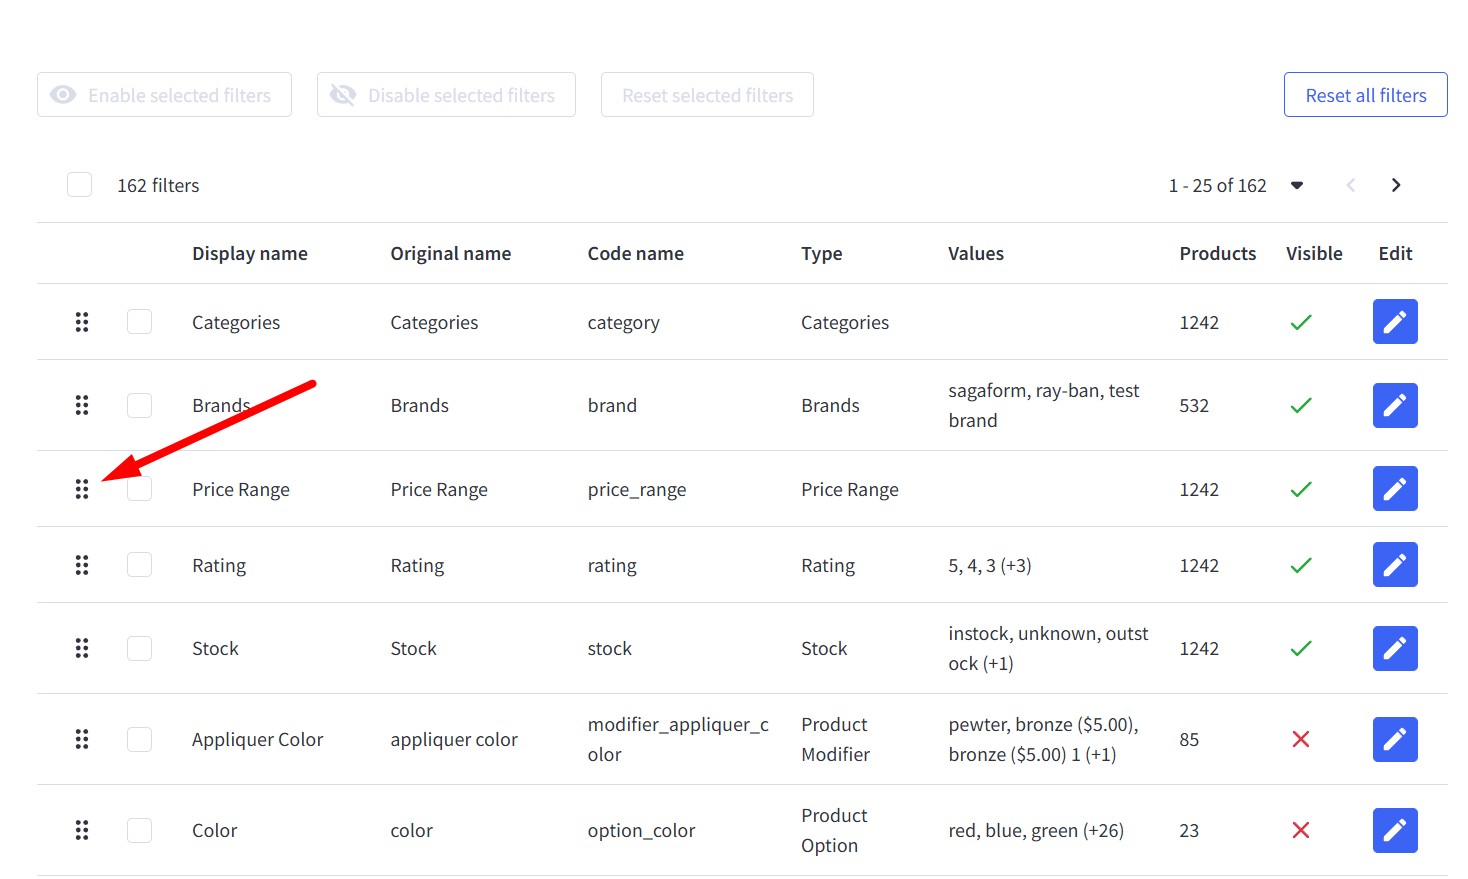
Tip: Place most important filters at the top. Order is automatically saved.
Universal Filter Settings
Configure these common options for all filter types:
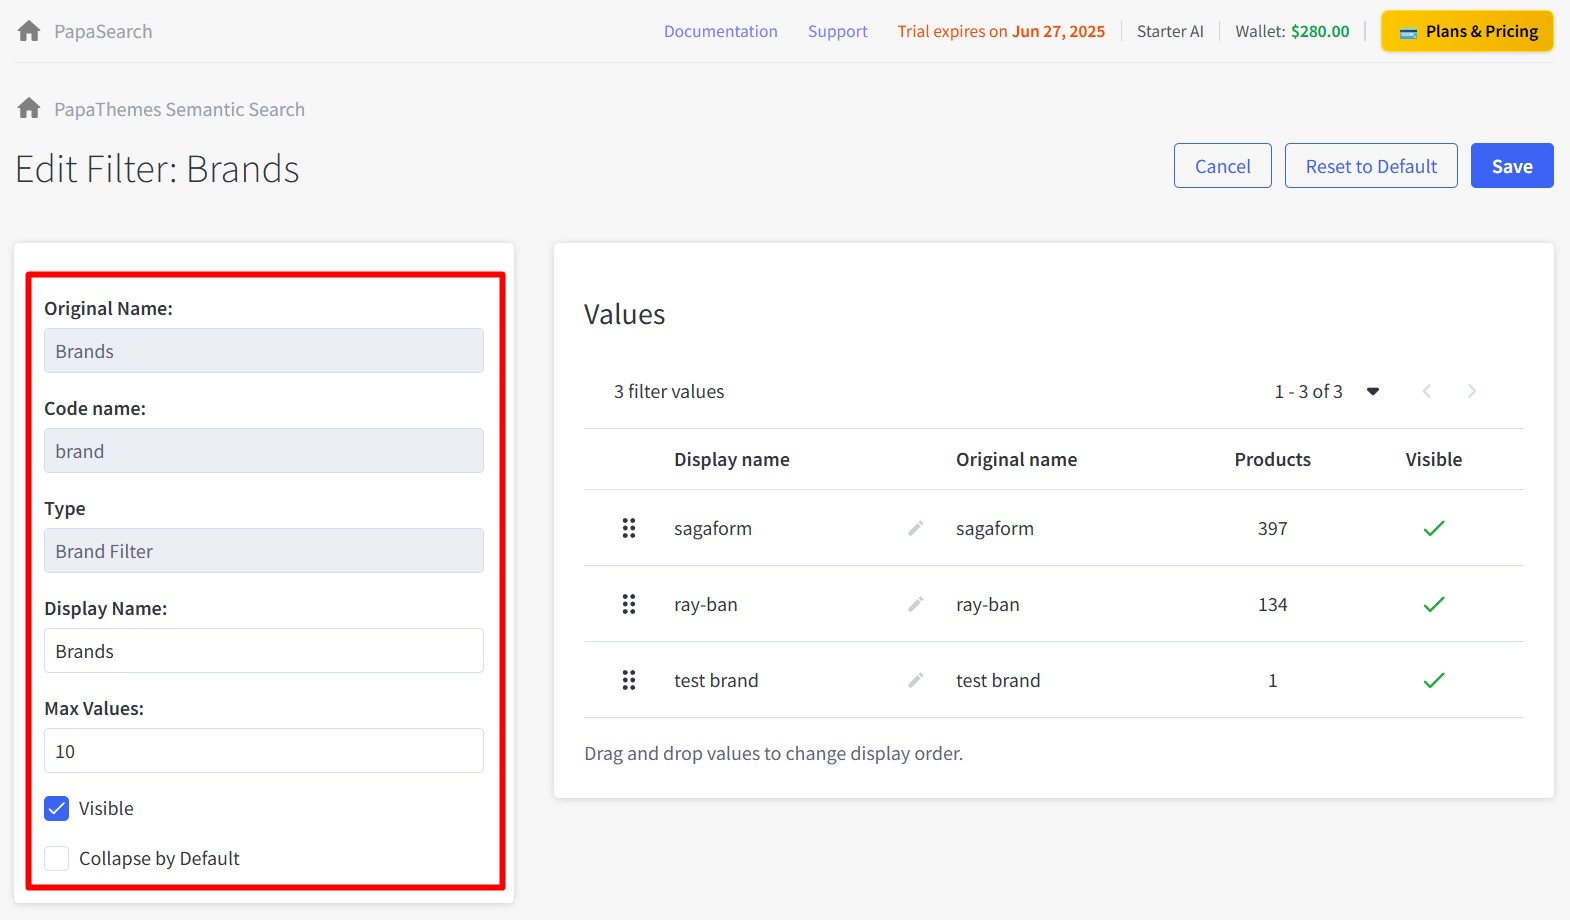
Original Name
System-generated field name (read-only).
Code Name
Internal identifier used by the system (read-only).
Type
Filter type classification (read-only).
Display Name
Customer-facing label on storefront. Use clear, simple names.
Max Values
Maximum number of options displayed (default: 10).
How it works: - With value: Shows only the specified number of options, additional options appear in scrollable area - Empty/blank: Shows all available options without scrollbar, no limit
Example: - Set to "5": Shows first 5 brand options, remaining brands accessible via scroll - Leave blank: Shows all 20+ brands in expanded list without scrolling
Visible
Check to show filter on storefront.
Collapse by Default
Check to start filter in collapsed state.
Filter Type-Specific Settings
Brand Filter
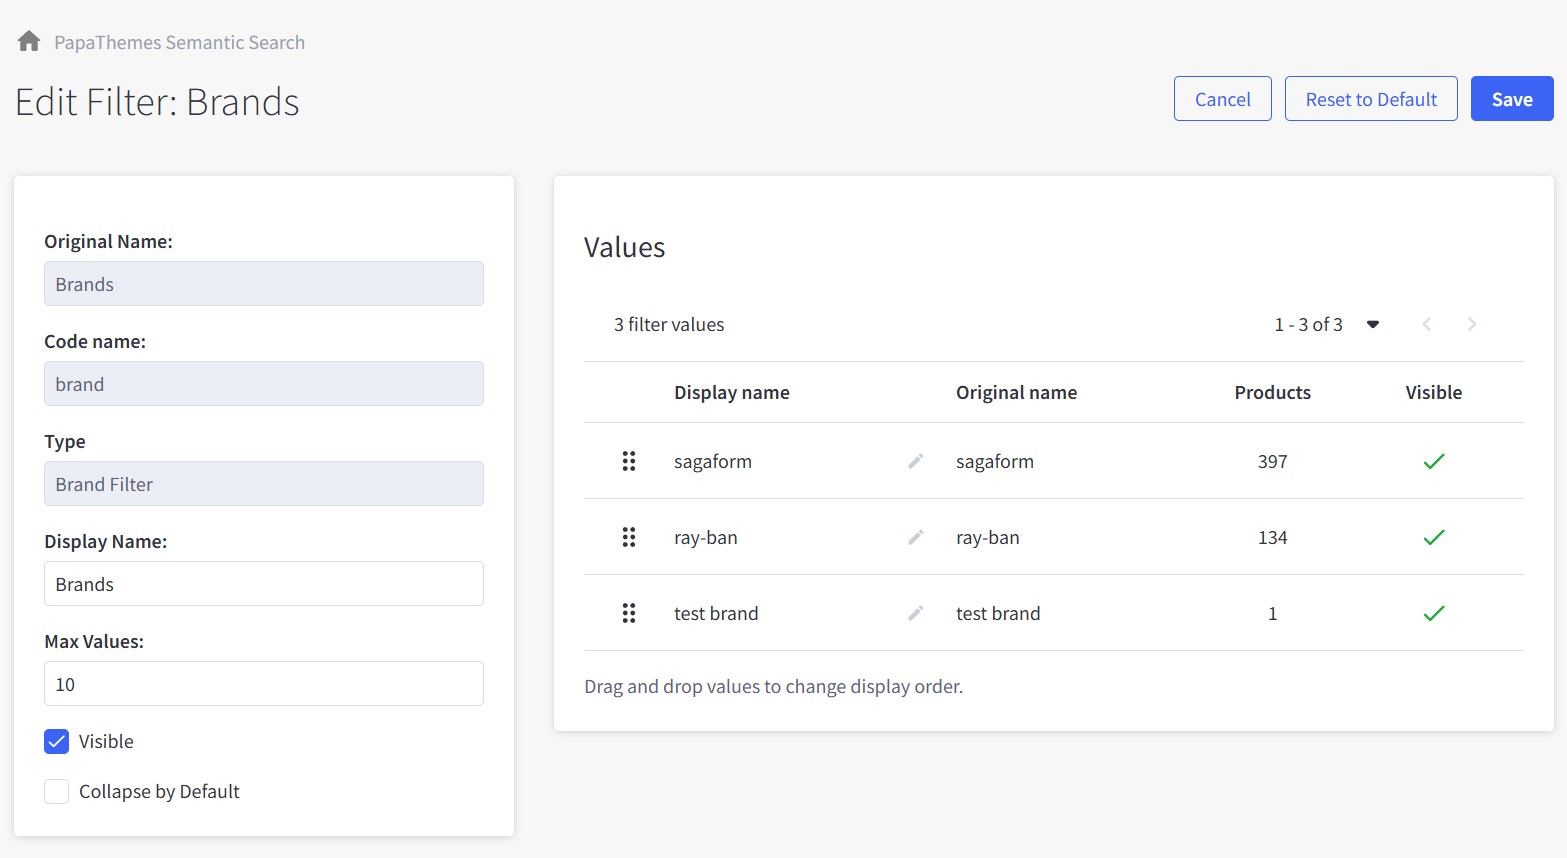
Configure how customers filter products by brand on your storefront.
Settings:
- Display Name: Label shown to customers (default: "Brands")
- Max Values: Number of brand options displayed at once (default: 10)
- Visible: Check to show filter on storefront
- Collapse by Default: Check to start filter in collapsed state
Brand Values:
- View all available brands with product counts
- Use ⋮⋮ handles to drag and reorder brand display order
- Click ✏️ (pencil icon) to edit individual brand display names
- Toggle individual brand visibility with checkmarks
- Higher product count brands typically perform better at the top
Price Filter
Configure how customers filter products by price range on your storefront.
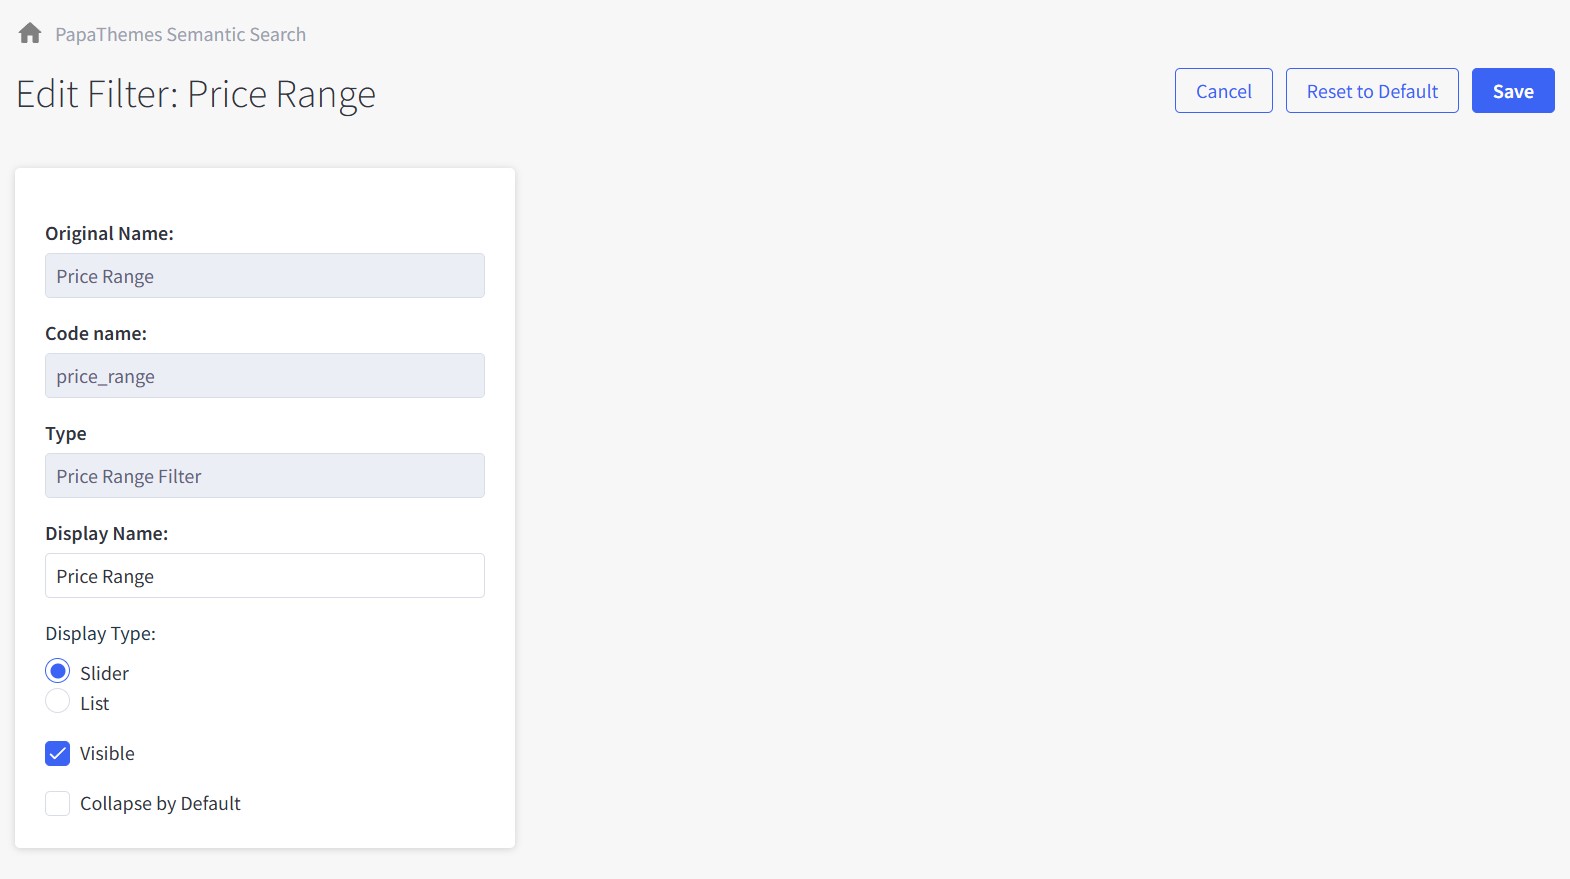
Settings:
- Display Name: Label shown to customers (default: "Price Range")
-
Display Type: Choose between Slider or List format
-
Slider: Draggable range selector (good for wide price ranges)
-
List: Predefined price brackets (good for specific tiers)
-
Visible: Check to show filter on storefront
- Collapse by Default: Check to start filter in collapsed state
Price Ranges:
Price ranges are automatically generated based on your product prices and store currency. The system creates appropriate brackets that update when you add new products.
Category Filter
Configure how customers filter products by category on your storefront.
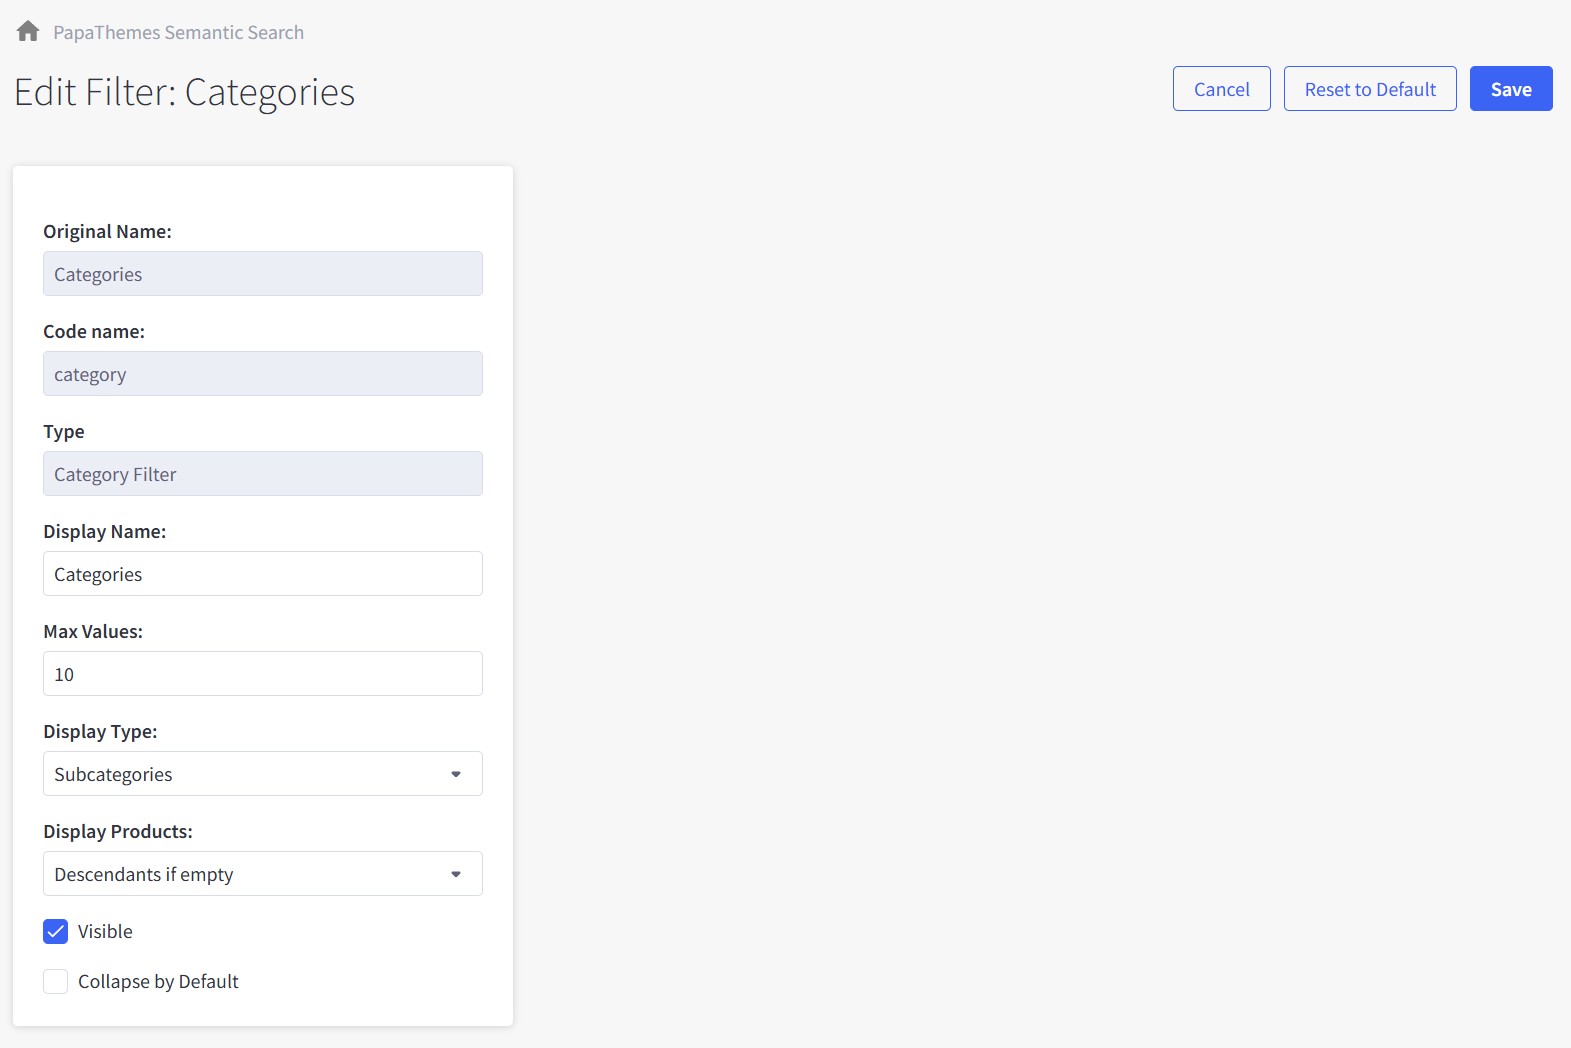
Settings:
- Display Name: Label shown to customers (default: "Categories")
- Max Values: Number of category options displayed at once (default: 10)
-
Display Type: Choose how categories are shown
-
Subcategories: Show only immediate child categories
- All Descendants: Show all subcategories and their children
-
Entire Tree: Show complete category structure
-
Display Products: Control empty category visibility
-
Descendants if empty: Show categories even without direct products
-
Hide if empty: Only show categories with products
-
Visible: Check to show filter on storefront
- Collapse by Default: Check to start filter in collapsed state
Custom Field, Modifier & Option Filters
Configure filters for product custom fields, modifiers, and options like Size, Color, Material, etc.
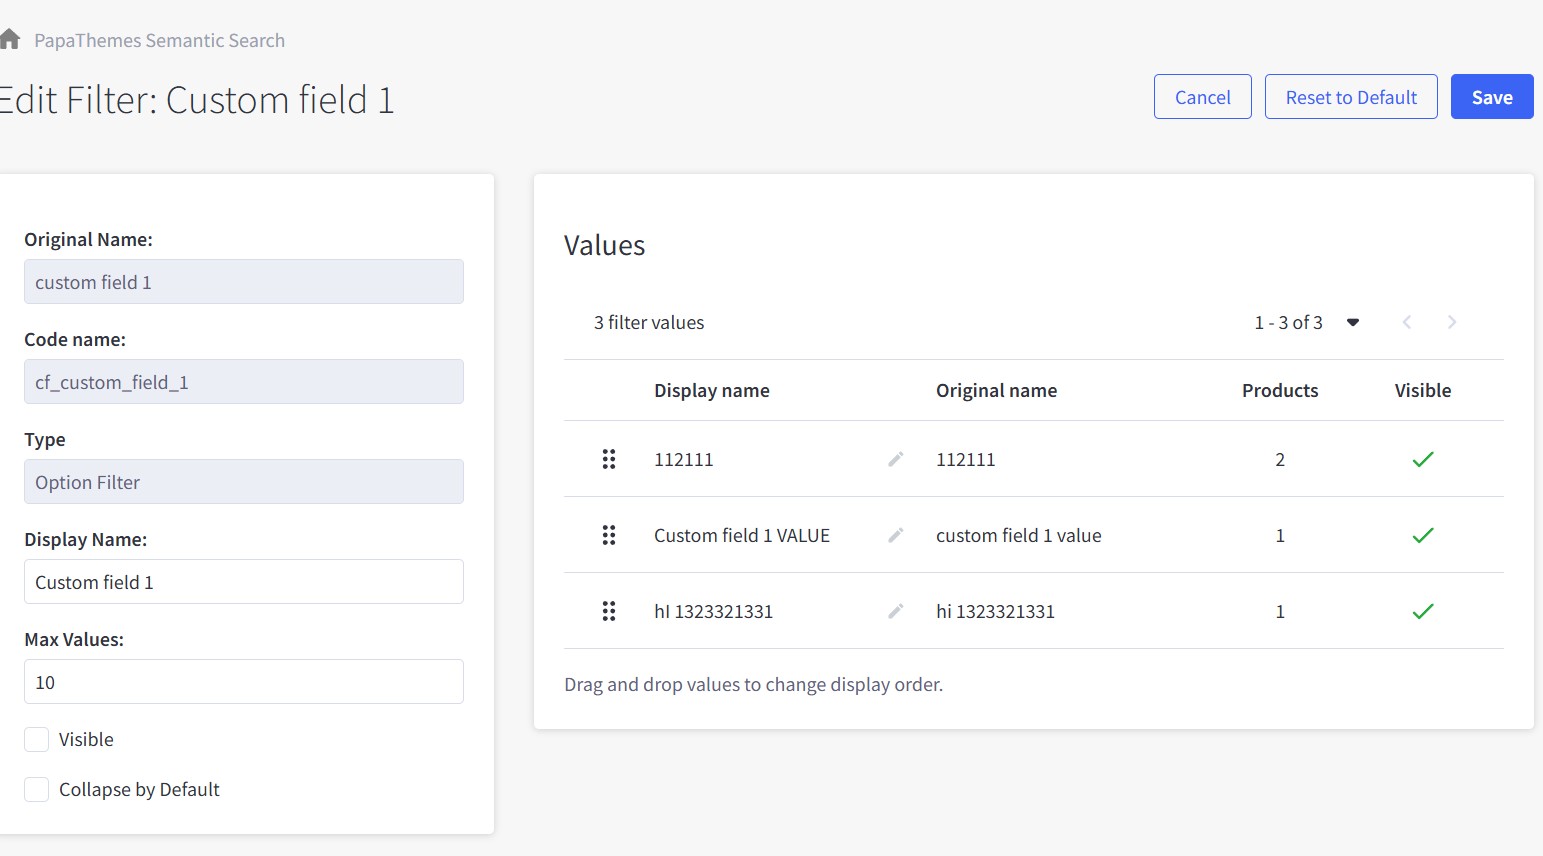
Settings:
- Original Name: System field name (read-only)
- Code Name: Internal identifier (read-only)
- Type: Filter classification (read-only)
- Display Name: Label shown to customers (editable)
- Max Values: Number of options displayed at once (default: 10)
- Visible: Check to show filter on storefront
- Collapse by Default: Check to start filter in collapsed state
Custom Field Values:
- View all available field values with product counts
- Use ⋮⋮ handles to drag and reorder value display order
- Click ✏️ (pencil icon) to edit individual value display names
- Toggle individual value visibility with checkmarks
- Values are automatically populated from your product custom fields
Note: This same configuration applies to Product Modifier filters and Product Option filters with identical settings and functionality.
Rating Filter
Configure how customers filter products by review ratings on your storefront.
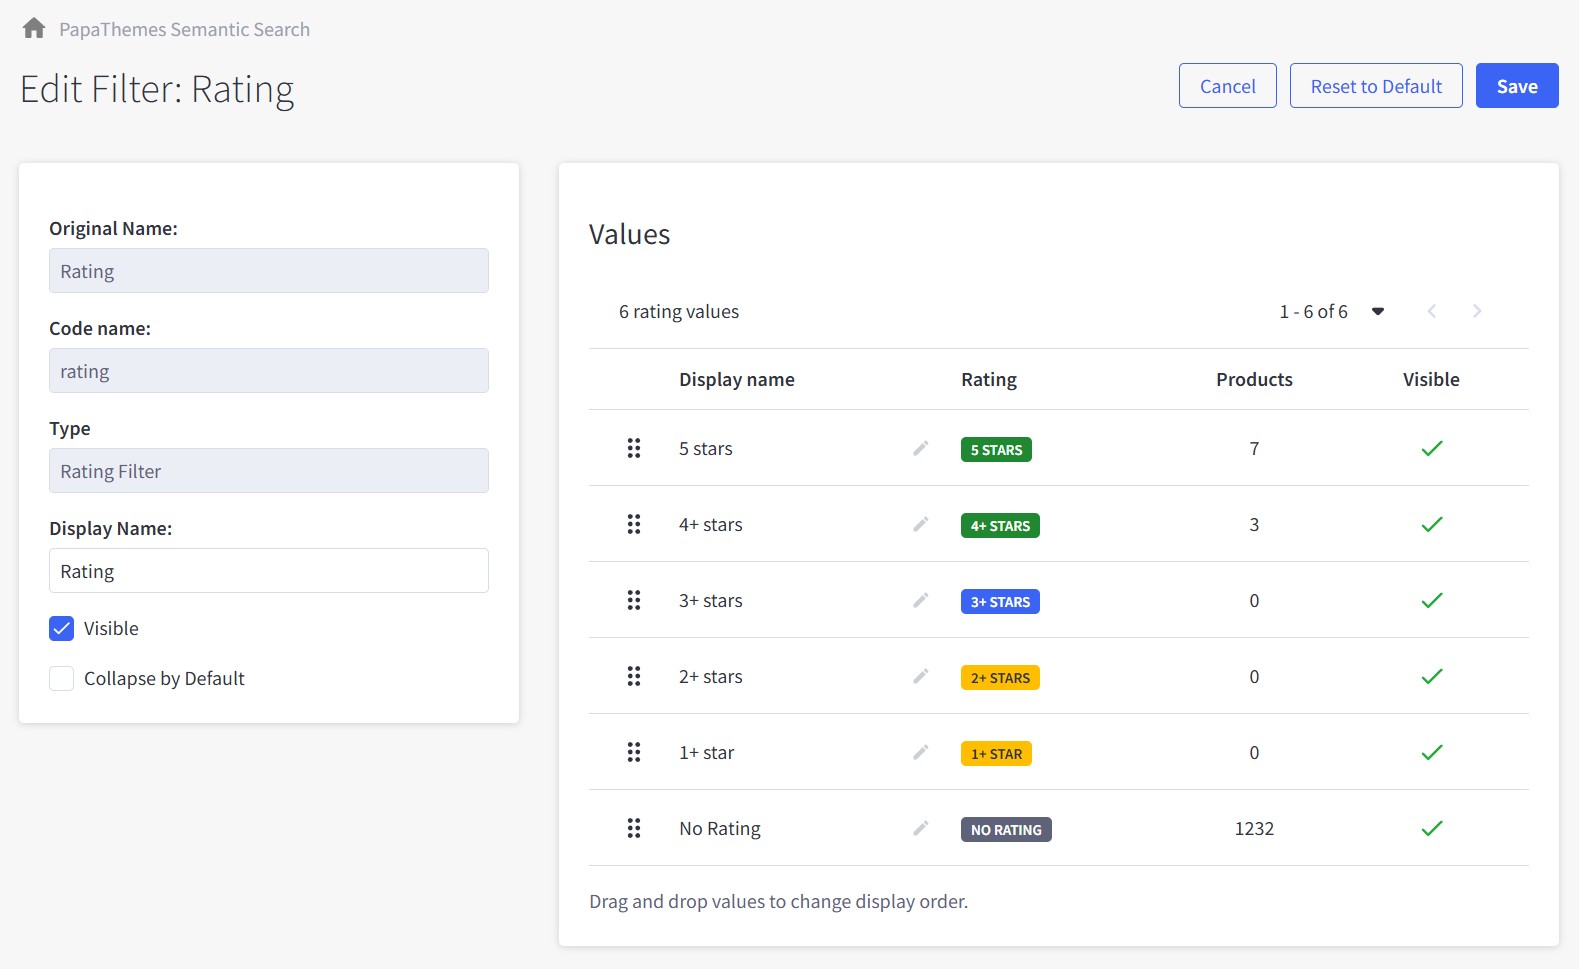
Settings:
- Original Name: System field name (read-only)
- Code Name: Internal identifier (read-only)
- Type: Filter classification (read-only)
- Display Name: Label shown to customers (default: "Rating")
- Visible: Check to show filter on storefront
- Collapse by Default: Check to start filter in collapsed state
Rating Values:
- View all available rating thresholds with product counts
- Pre-defined options: 5 stars, 4+ stars, 3+ stars, 2+ stars, 1+ star, No Rating
- Use ⋮⋮ handles to drag and reorder rating display order
- Click ✏️ (pencil icon) to edit individual rating display names
- Toggle individual rating visibility with checkmarks
- Color-coded badges help distinguish different rating levels
Stock Status Filter
Configure how customers filter products by stock availability on your storefront.
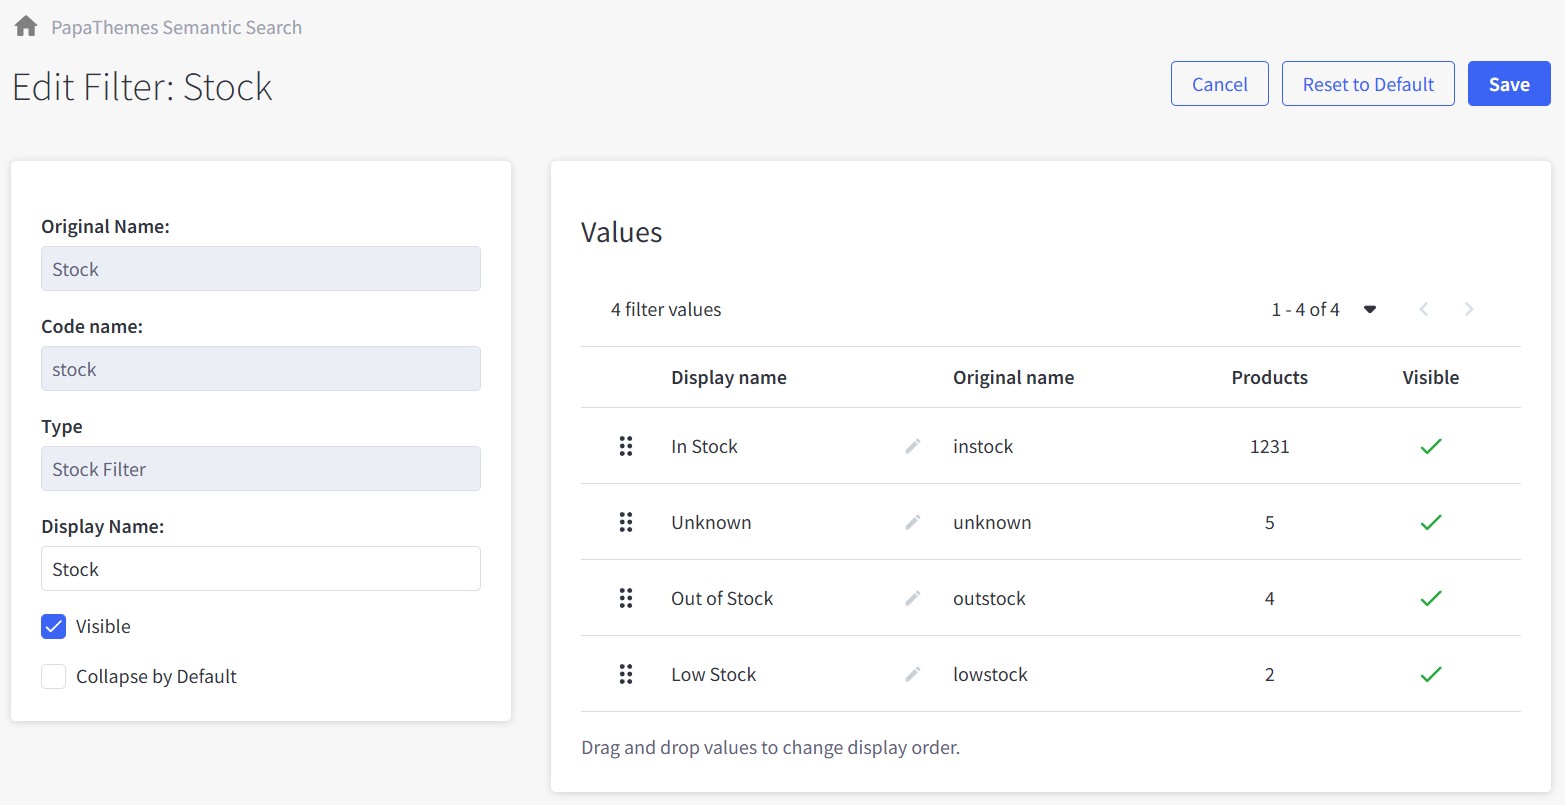
Settings:
- Original Name: System field name (read-only)
- Code Name: Internal identifier (read-only)
- Type: Filter classification (read-only)
- Display Name: Label shown to customers (default: "Stock")
- Visible: Check to show filter on storefront
- Collapse by Default: Check to start filter in collapsed state
Stock Values:
- View all available stock status options with product counts
- Pre-defined options: In Stock, Unknown, Out of Stock, Low Stock
- Use ⋮⋮ handles to drag and reorder stock status display order
- Click ✏️ (pencil icon) to edit individual status display names
- Toggle individual status visibility with checkmarks
- Stock levels are automatically determined by your BigCommerce inventory settings
Filter Logic & Behavior
Understanding how filters work together when customers make selections:
Multiple Values in Same Filter (OR Logic)
When customers select multiple options within a single filter, results show products matching ANY of the selected values:
Example - Brand Filter: - Customer selects: "Apple" + "Samsung" - Results show: Products from Apple OR Samsung brands
Multiple Different Filters (AND Logic)
When customers select options from different filters, results show products matching ALL filter conditions:
Example - Multiple Filters: - Customer selects: Brand = "Apple" + Color = "Red" + Price = "$100-200" - Results show: Products that are Apple AND Red AND priced $100-200
Practical Example:
If a customer selects: - Brands: Apple, Samsung (OR logic within Brand filter) - Colors: Red, Blue (OR logic within Color filter) - Price: $100-200
Results will show: Products that are (Apple OR Samsung) AND (Red OR Blue) AND ($100-200)
This logic provides intuitive filtering that matches customer expectations and shopping behavior.
Performance & Best Practices
Recommended Limits:
- Recommend 20 filters or fewer per category for optimal performance
- Default 10 values per filter (adjustable via Max Values setting)
- Higher numbers may impact page load speed
Category-Specific Customization:
Each category can have different filter configurations:
- Electronics: Brand, Price, Rating, Stock filters
- Clothing: Brand, Size, Color, Material, Price filters
- Home & Garden: Category, Price, Material, Color filters
Inheritance Feature:
Use filter inheritance to save time and maintain consistency:
- Parent Category Setup: Configure filters once on main category
- Child Categories: Automatically inherit parent filters
- Auto-Updates: Changes to parent filters automatically apply to children
- Override Option: Child categories can customize inherited filters if needed
Benefits of Inheritance:
- Reduces manual configuration work
- Ensures consistent filter experience
- Automatic updates across related categories
- Easy bulk management of filter changes
Quick Tips
- Filter Names: Use customer-friendly language, avoid technical terms
- Max Values: Set limits for large catalogs, leave blank for small ones
- Order Matters: Place most important filters at the top
- Test Regularly: Check filter behavior on both desktop and mobile
- Monitor Usage: Use analytics to see which filters customers use most
Next Steps: After configuring your filters, move on to Chapter 6: Keyword Management to optimize search functionality.
Need help with filter configuration? Contact our support team through the app dashboard.